The principle then is to have one animation, the Timeline, and link each door and the drawbar to this attribute. Let's start by examining the values we are working with.
Door 1 (LeftAngle) begins at -90 when open and ends at 0 when closed
Door 2 (RightAngle) begins at -90 when open and ends at -180 when closed
The Drawbar (BarPosition) begins at -210 when drawn back and ends at -5 when closed
The Timeline will go from 0 to 100 in 1.1 seconds.
As a chart, this is:
| Time | 0 seconds | 0.5 seconds | 0.6 seconds | 1.1 seconds |
|---|---|---|---|---|
| Timeline | 0 | 45% | 55% | 100% |
| LeftAngle | -90 | 0 | 0 | 0 |
| RightAngle | -90 | -180 | -180 | -180 |
| BarPosition | -210 | -210 | -210 | -5 |
| Process | Start doors | End doors | Starts bar | End bar |
Notes: the % in the Timeline isn't included when we enter actual values, it's just there to show that the Timeline is like a counter going from 0 to 100% (completed). The Process when reversed, would be "End Doors - Start Doors - End Drawbar - Start Drawbar".
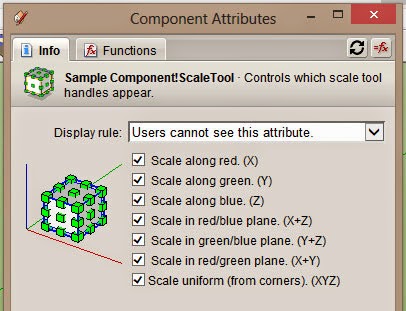
The first thing to do is to remove all the formulas and functions from the main "DC7" attributes (but leave the formulas in the subcomponents linking the Doors' RotZ to LeftAngle and RightAngle, and the Drawbar X position to BarPosition). Your Components Attributes window should look like this:
Now we add the single animation to the onClick attribute:
ANIMATECUSTOM("Timeline",1.1,0,0,0,100)
This is almost the same as the one we used in the previous lesson except that Timeline is now going from 0 (%) to 100 (%) and the easing is zero-zero since I want no change in acceleration. Clicking on the component now seems to have no effect but, if you make the Timeline visible, you can see it changing from 0 to 100 and back on each click.
(If you have forgotten how to make an attribute visible, click on the Details button on the right of the Timeline which looks like a menu combined with an arrow (see image below). Change "Display Rule" to "Users can see this attribute" and Apply. Now, if you have the Component Options window open when you click, you can see the value of the Timeline changing.)
 |
| The Details button, used to make the Timeline attribute visible |
The formulas
Now for the formulas. If we start with the left door, we see that when Timeline is zero, LeftAngle must equal -90 and, when Timeline is 45, it must equal 0. If we add 90 first to get rid of the negative numbers (which can be confusing) we find that
0 Timeline = 0 LeftAngle
45 Timeline = 90 LeftAngle
and the formula is therefore:
LeftAngle = (Timeline * 2) - 90
(The brackets aren't necessary because of the rules of algebra but they make things clearer.)
When working out a formula, remember to add some intermediate angles in the calculation to check. In this case. 22.5 would be halfway along the Timeline and the LeftAngle would be -45 which, when I check the calculation, works out correctly. This is where the spreadsheet comes in useful.
The formula that we need to enter in the LeftAngle then is:
=IF(Timeline>45,0,Timeline*2-90)
Meaning: if the Timeline is greater than 45, set it to zero (closed), else animate it.
Enter this, click on the component and you should see the left door open and close.
Note: the fact that the Timeline value is exactly half the LeftAngle is coincidence. It makes it a bit easier but isn't important.
For the second door, we need:
0 Timeline = -90 RightAngle
45 Timeline = -180 RightAngle
A formula I worked out for this is:
RightAngle = 0 - ( 90 + ( Timeline * 2 ) )
=IF( Timeline>45, -180, 0-(90+(Timeline*2)) )
So now, clicking the model opens both Doors.
Note that, after the Doors open, the animation runs on for 0.6 seconds with nothing apparently happening so don't click again too soon after the first click. Allow the animation time to finish.
Finally the Drawbar where we need:
55 Timeline = -210 BarPosition
100 Timeline = -5 BarPosition
Thanks to Excel, I find that the formula is:
BarPosition = (4.5556 * Timeline) - 460.5
so the formula for BarPosition is:
=IF(Timeline<55,-210,4.5556*Timeline-460.5)
Now, click on the component and two animations work together, both opening and closing.
The final settings:
Creating timelines and linking multiple animations is tricky, involving caeful maths and logical thinking, but the results can be very pleasing.
The final model is available on 3D Warehouse at https://3dwarehouse.sketchup.com/model.html?id=u9644e7be-7be5-4764-a2e6-785d96c41259


